VPN WizardGUI Instructions |
Sponsored By TechLink Home |
This section is where we create the actual VPN.
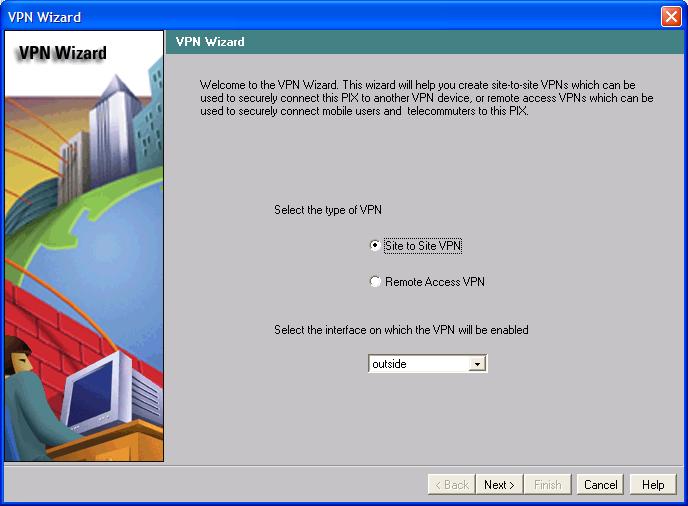
Go to "Wizards/VPN Wizard". Select site to site VPN, and click on next.
Enter the IP address of the foreign site. In this case, we are going to pretend our Wellington site has an IP address of 192.168.3.201 (note that this would usually be a public IP address, and would be assigned by the ISP). Enter the password used to bring the VPN up (the pre-shared key). Click on next.

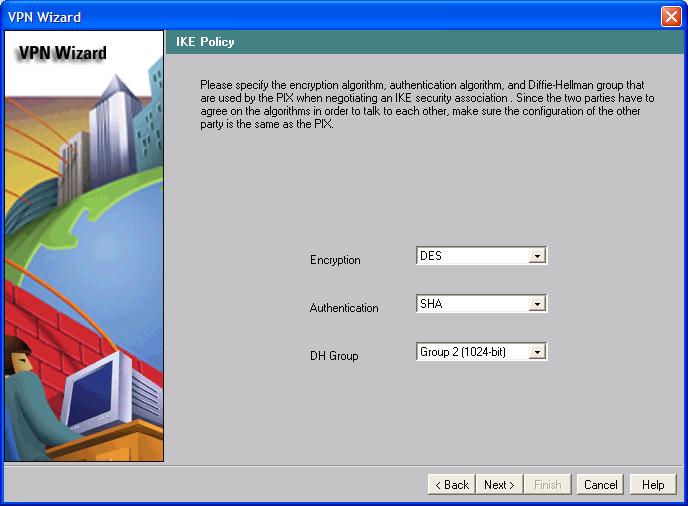
Click on next.
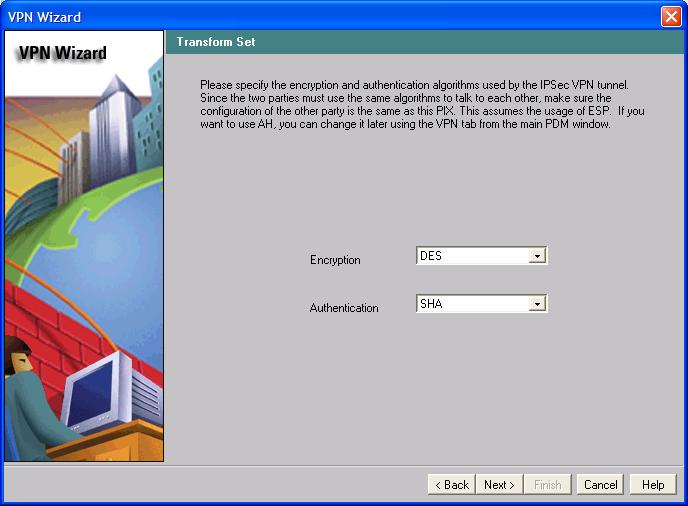
Click on next.
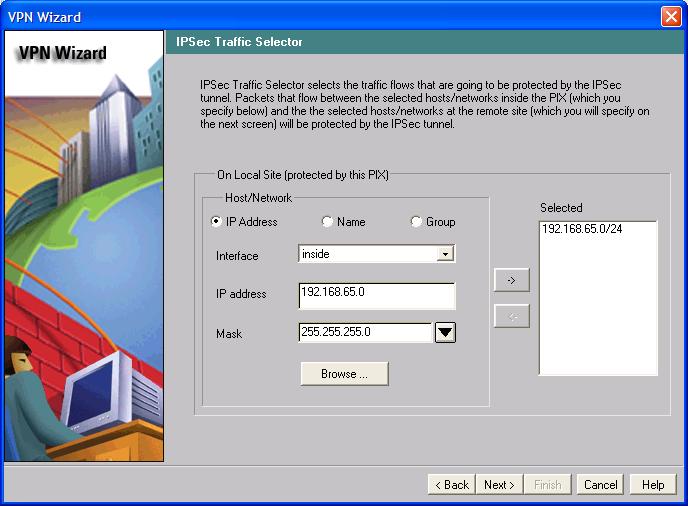
Enter the IP address and netmask of the local Auckland network, and click on the right hand arrow. Make sure your screen resembles the below screen shot. Click on next.
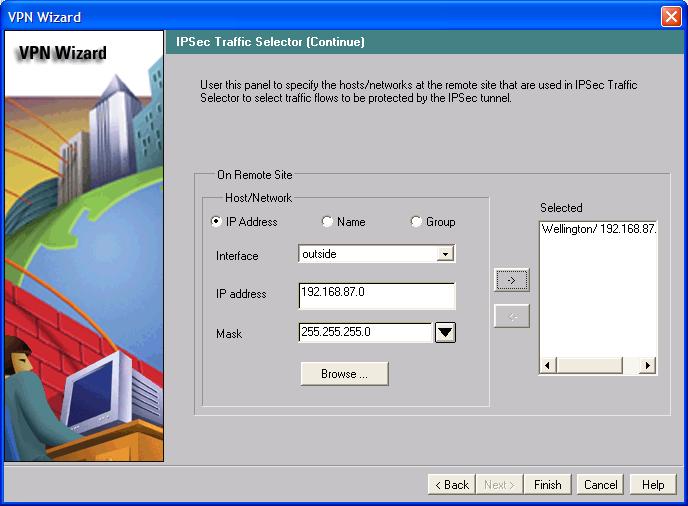
Now we enter the IP address range used for the remote network. In this case, we have a pretend Wellington site using the netblock 192.168.87.0. Click on the right hand arrow.
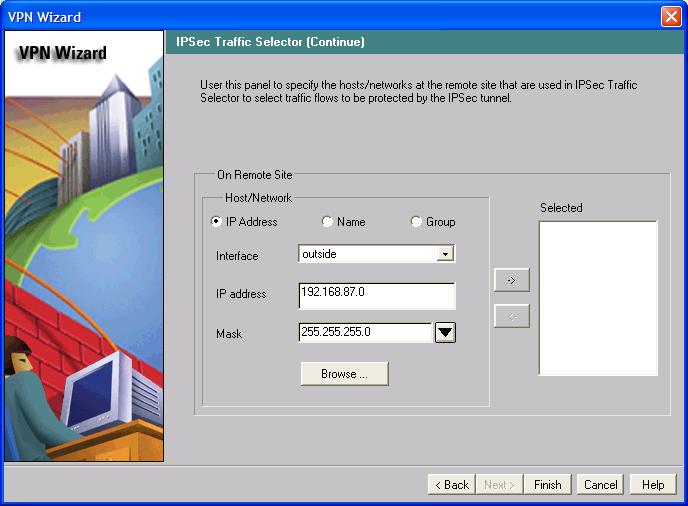
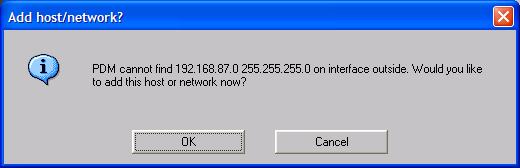
The PIX box has never heard of this remote network, and it prompts you to add it. Click OK.
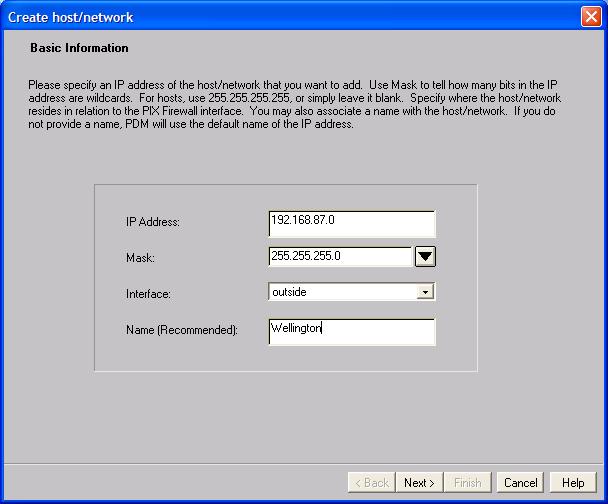
The only thing you need to enter is the site name. In this case, Wellington. Click on next.
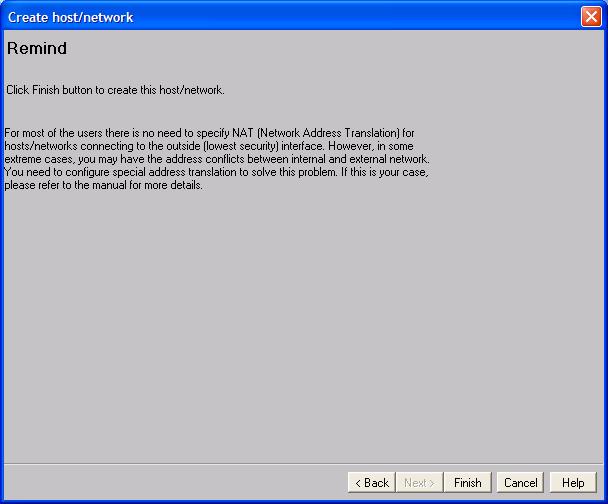
Click on finish.
Click on the right hand arrow to add the network to the "Selected" column. Click on next.
Now all you need to do is permanently save the config using the "Save to Flash Needed" button at the top, like you did previously.
Your pretty much finished one end now. Now repeat the whole process for the other end.
GUI Instructions